
Inventor
|
Inventor® and Inventor® Professional mechanical design and 3D CAD software includes: freeform, direct, and parametric modeling options; design automation tools; and advanced simulation and visualization tools.
This software allows students to make 3D representations of their designs with industry level software. Throughout the tutorials, students will watch video clips as they learn the software and model a scooter. AutoDesk allows students to download the software for free from the site below. http://www.autodesk.com/education/free-software/all 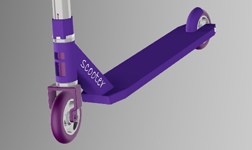
|
Standards:
Target Outcomes: Why are engineering drawings important? What kids of drawings are most useful in engineering? Demonstrate how to create a 3D model using solid modeling software. Unit Topics: Visualization 3D modeling Orthographic and Isometric sketches Geometric Planes Vocabulary: Scale Measurement Orthographic Isometric Geometric Planes |
Presentations - Use AutoDesk Inventor to Recreate the Part in the Video
|
Part 1 - Modeling a Tire
Learn how to design a scooter with Autodesk Inventor by starting with modeling the tire using two different approaches. Part Features covered = Extrude, Revolve, Fillet, Materials |
Part 2 - Modeling a Wheel
Part Features covered = Extrude, Extruded Cut, Revolve Cut, Circular Pattern, Mirror, Materials |
|
|
|
|
Part 3 - Modeling Fork This tutorial will show you how to model the fork of the scooter. Part Features covered = Extrude, Loft, Sweep, Fillet, Chamfer, Shell, Mirror, Hole, Materials, Work Planes |
Part 4 - Modeling Deck Modeling the last part of the scooter -- the deck. Part Features covered = Rectangular Pattern Rib, Decal, Emboss You will need to download and unzip the files below for this activity. |
|
|
| ||
|
Part 5 - Assemblies Wheel Follow the steps to assemble the wheel you have already designed. |
Part 6 - Assemblies Full Follow the steps to fully assemble the scooter. |
|
|
|
|
| ||||
Try to create the following challenge drawings using Inventor
and what you have learned so far.
| inventor_challenge_drawings.pdf |
| project2_3_1aminiature_train.pdf |
|
Part 7 - Orthographic Drawing - Wheel In this tutorial you will learn step by step how to create an orthographic drawing of the wheel. Drawing Features Covered = Base View, Projected View, Sections, Hidden Details, Auxiliary View, Detailed Dimensions |
Part 8 - Orthographic Drawing - Fork Learn how to create an orthographic drawing of the fork. Drawing Features Covered = Base View, Projected View, Sections, Break View, Hidden Details, Auxiliary View, Detailed Dimensions, Hole Details |
|
|
|
|
Part 9 - Orthographic Drawing - Deck Assembly
In this tutorial you will learn step by step how to create an orthographic drawing of the wheel. Drawing Features Covered = Base View, Projected View, Sections, Hidden Details, Auxiliary View, Detailed Dimensions |
Part 10 - Presentation Files
During this tutorial, you will learn how to produce a complete presentation file. Publishing Outputs Covered = Presentation Files, Exploded View Drawings, AVI production |
|
|
|
|
Part 11 - Driven Constraints
In this video we will look at the driven constraints and motion constraints. Publishing Outputs Covered = Driven Constraints, Rendered Images |
Part 12 - Rendering Studio
In this tutorial we learn how to render with Inventor Studio. Rendering allows you to produce flawless images. Publishing Outputs Covered = Rendered Images |
|
|
|
|
Part 13 - Producing STL Files
In this video we will look at how to produce a .STL file. STL file is also known as STereoLithography file for CAD/CAM or 3D Printing. |
Part 14 - Sheet Metal
In this video we create a scooter stand using the sheet metal modeling process. |
|
|
|
